Showing posts with label Card Sketch. Show all posts

Friday, February 3, 2012

Card Sketch Challenge

Hello everyone! It's me - quickly stopping in for the monthly sketch challenge. I do have to apologize - I only have one sketch to share with you this month - but I have decided that I will not feel guilty about it. I got done what I could and that is the best I could do for right now. I hope you are okay with it too!

I have recently become enamored with digital stamps, but alas - I have no real markers, just some watercolor markers and pencils. *SIGH* I hope to someday change this situation but don't see it happening any time in the very near future. Until then I shall have to be content with my pencils and my Crayolas and drooling over the video of the new Tim Holtz markers from CHA. Now that I am done whining - onto my card sketch!


And now for my card:


I used a card base from Damask Decor cut at 5 inches. The adorable little baby is from Mo's Digital Pencil Too and I am absolutely enamored of her work - many thanks to Kymberlee for gifting me with this image. I colored him with my pencils (not my Crayolas) and then added a ribbon and a ribbon tag. I finally finished off with some adhesive pearls. This card was for a shower for a good friend and I created a few other gifts that I hope to get up on my personal blog this weekend (fingers crossed!).

So your sketch challenge for this month is to incorporate a stamped or even a printed image into your card (or layout - you know we aren't picky) - and maybe next  month I will have a layout for you! Happy Crafting!
---Allison


Thursday, January 5, 2012

January Sketch Challenge!

Time for some sketches! I kept things simple this month and I may have cheated a teeny bit but I got them done!
Layout Sketch
And the layout.....

I will admit this is an older layout - I did not have time - so I searched through my older layouts for something to use and I decided to pick this one because it uses a bunch of pictures and because I liked how I was able to use pictures from different events in the same layout!

My card sketch is very simple and I hope you all understand that I am just not the best card maker so I find simple is easier for me to wrap my head around.  

I was able to make TWO quick versions of this card since I kept is so simple - and you might recognize some elements of the card!


Do those snowflakes look familiar? They are from my Technique Tuesday post! For the first card I stamped the sentiment on a ribbon and added a gem sticker, while on the second card I added a gem brad and an embossed piece of paper that I pop dotted for some extra dimension.

I hope you are inspired by my simple sketches and not too hurt by my cheating - can't wait to see what you make! Happy crafting!
---Allison


Friday, December 2, 2011

December Sketch Challenge

Hi Everyone!!!! Caroline here. Nope it's not Sunday and you haven't missed the weekend. Allison has been caught up with some work stuff this week and asked me take over for her for this sketch challenge weekend.

I have some large shoes to fill and was a little nervous cause she's the queen of layouts but she did hold my hand and give me the sketches to work with :oP

Layout Sketch

Card Sketch

So I've been trying to scrap my wedding pictures ... it's only been 5 years so why not start now.
Considering I haven't done layouts in a very LONG time I'm pleased with the way these turned out. On the black embossed panel I used white/clear smooch spritz to tone down the black.

Now for the card
Close up of the charms

The little snowflake squares are foil tape run through the cuttlebug and then dyed with alcohol ink.

The charms were made with beads and mini jingle bells. Now it's your turn. Let's see your take on the sketches.

---Caroline


Friday, November 25, 2011

Sketch Challenge - Holiday Cards

Happy Black Friday! Diane from My Time to Craft here as your guest designer. The holiday season is upon us I'm sure plenty of you were out and about early this morning working on that holiday list, but don't forget about the holiday cards. Today I've created a simple sketch for use help get those cards under way.
As with most sketches, you can make this as simple or complex as you like. I find I usually start out very ornate, but by the time I get to the end, my cards are really simple (I just can't seem to assembly line craft).

This time of year, my Martha Stewart punches are often the tool of choice. If it's not the branch punch, then it's usually the holly.

In this first one, I used the holly to make a circular area behind a corrugated star that I inked with gold and wrapped in Holiday Divine Twine.

For the second, the holly created a traditional wreath. I love the crinkly Wassau paper used as the square in the first picture and the lace here.
I would love to see what your holiday cards are looking like. As with all PCWC challenges, follow the sketch or don't, it doesn't matter. Just have fun!

- Diane from My Time to Craft


Friday, November 4, 2011

November Sketch Challenge

I am here with this month's sketch challenge ~ and a big heaping spoonful of apology as I have the sketches but sadly no projects to share. I really wrestled with posting this week because between Halloween, a cold kicking my butt, parent conferences, and some other issues I just couldn't get the projects done. The most frustrating part is that I can "see" them in my head I just couldn't get them complete and on paper! But then I kicked my own butt and reminded myself this is supposed to fun and be my stress relief and not creating additional stress - so here I am and here are the sketches!

Layout Sketch

Card Sketch
I really hope that things are going much better for all of you and you get a chance to do something with these. I promise that I am going to try my darndest to do something with them this weekend - and if I get the chance I will edit this post and put them here or post them next weekend! I hope you can forgive my lack of effort!! And I wish you all happy crafting!
---Allison


Friday, October 7, 2011

October Sketch Challenge

Are you ready to get your sketch on?? I have been busy with these for what seems like forever (!!) but they are finally done and ready for your consumption. And after wresting with the layout for days, only except it felt like weeks, I am finally pleased with the outcome. And now - the sketches!

Layout Sketch

Card Sketch
and now for the projects:


Now before you think I have lost my mind - yes I did do a one page layout sketch but I turned it into a two page layout. Why you ask?? Well the first reason is that last month someone said they liked the sketch but they needed a two page layout  so I wanted to show how it could be done. And the second reason is that I totally planned to do this as one page - even had little wallet size pics printed out  - but then I couldn't bare to just stick to one page!! Look at that little sweetie in her kitty outfit! It was such a nice memory and such great pictures I HAD to do for two pages. 


The printed paper and embellishments are all various K and Company Halloween brands except for the brads  which are Studio G. I used Happy Hauntings for the frame shape behind the large picture - cut at about 8 inches but I also unlocked the width and made it a little skinnier. The yellow circle is from George. 


For this page, I hand trimmed the cat paper to follow the shape of the pattern and then used Celebrate with Flourish for the title which is cut at 3 inches. Now for the cards: 


I decided to do the card sketch in two ways - and you will have to forgive me if I give you incorrect information on the cuts. I promise I do write these things down - I just lose the paper I wrote them down on!! The printed paper is from a Halloween themed scrap stack I found at ACMoore. 


To create the spider web I used a Studio G stamp and some bronze heat embossing powder. If you missed Caroline's tutorial on heat embossing you can see it here. The spiders are epoxy stickers by Recollections. The "boo" is from Mini Monsters and it didn't have a shadow so I cut it twice and layered it. Then I decided it should be more sparkly so I covered it with stickles. For the inside I used more of the paper from the scrap stack and heat embossed with black embossing powder. 


For the second card, I turned the sketch on the side and replaced the boo with an "eek" from Happy Hauntings. I forgot to mention that under the webs is a grosgrain ribbon. 


And I really love how the inside came out - isn't the stamp great??


I think that is everything! Whew! I can't wait to see what you all create - and I hope the sketches inspire you to put your own stamp on them. They don't need to be Halloween - I just loved having the excuse! (although there may have been some tears when I actually had to use my pretty paper *sniff* it is better that I don't think about it) Happy crafting!
---Allison


Friday, September 2, 2011

September Sketch Challenge!

Are you ready to get started?? This is so exciting!! We decided to try and keep each week of the month a certain theme - easier for us to plan and for you to know what to expect. This does not mean however that we won't change it up now and then! I am just not so good at following the rules all the time - it must be Caroline's fault! I have not just one but TWO sketches for you  - so without further ado - here we go!!

Layout Sketch

Card Sketch
and now for the projects:


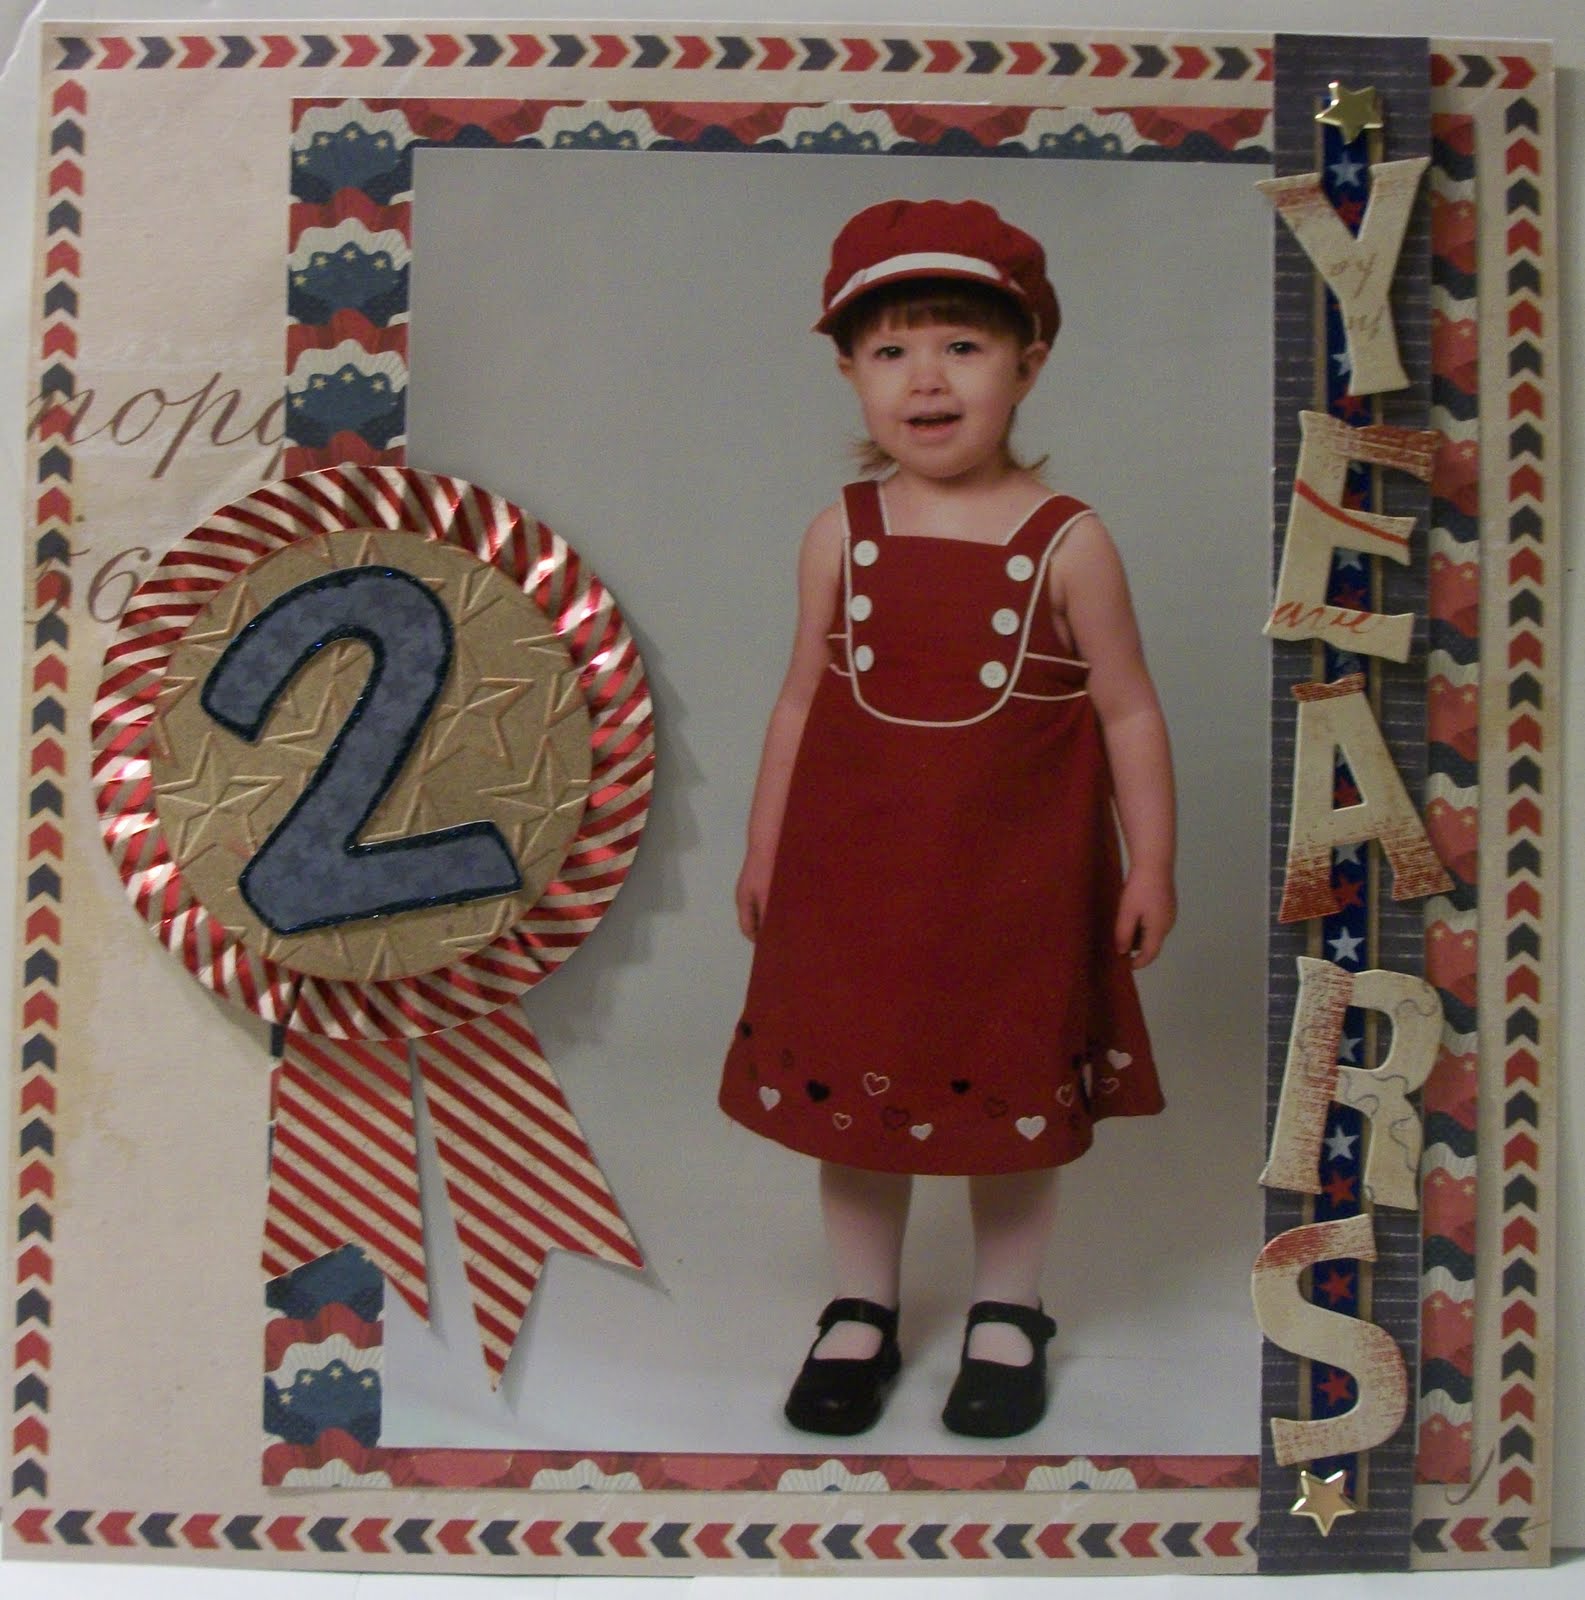
For this layout of my daughter I used paper from the K&Company Americana stack, along with the coordinating chipboard letters. I kept the design simple since I think I am going to use this as a title page tot her two year scrapbook. A closeup of the "award":

This is where I spent the most time on the layout. I began with the award shape which is cut from the Plantin Schoolbook cartridge at 6.70 inches with a 4 inch circle welded to it. On top of that I layered a pleated circle that I created from a 2 by 12 inch length piece of paper, scored at every 1/4 inch. In order to make it lie nice and flat without tearing I did need about a 3 inch strip of another pleated piece of paper. I adhered the ends together, pushed down the middle and secured it at the center with glue dots. Then I added a 3.40 inch circle or kraft paper, also cut from Plantin, that I ran through my Stars cuttlebug folder and lightly inked.I added a "2" from Disney's Pooh Font, cut at 3.10 inches and then outlined with Midnight blue stickles. For the other side, I used some star brads and ribbon on a spare strip of paper to add some layers behind the letters.


For my card I used the same method to create pleated circle - only not as wide. I used a 1-1/2 by 11 inch piece of paper and that was the perfect size to lay nicely without any extra paper. I cut two circles and layered them on top. I finished with an epoxy chipboard cupcake threaded with some bakers twine. The sentiment is a Hero Arts stamp and I used a shape that I stretched on my Gypsy. I wish I could be more specific on the sizes, and I know I wrote them down, but then I lost the paper! The card base is DCWV and the yellow paper is Recollections.

And that is it! Two sketches for you to choose from - one for whichever mood you are in today - card or layout. We are experimenting the a linking tool but it is our first time using it  - you may have to be patient with us. I can't wait to see what you create. Happy crafting!
---Allison