Showing posts with label George. Show all posts

Friday, December 9, 2011

Use Your Stash - Use Your Holiday Paper

Hello all! I feel as though I have been gone for years!! Life has and still is pretty crazy around here and it doesn't look like that is changing anytime soon. My craft room doubles as the dining room during the holiday season and I just got back in this week - it still isn't set up in real working order. That being said I am going to share a project I did last year and never shared - and then when I consider the amount of work that went into them  - how the heck did I not post them?? And it will serve as a reminder that I have done this before.

And yes - this week's challenge is to use your holiday paper - that's right I said it - you have to USE it. I know, I feel your pain, I may have one or two stacks that I have multiples of (or maybe even 4 or 5). I decided it should be this week's challenge because I have to challenge myself or I won't be able to do it!! It's so hard! I have projects to get done and that paper needs to be cut!! So steel yourselves and join me!

So without further ado, here are my projects!


Remember when there were no Cricut carts with Chinese takeout boxes?? These are Chinese takeout boxes that I made last year using a George file from Cindy McEvey's blog - the file did not quite work like I needed to so Caroline re-created it for me and it was the solution to my problems but they took for-ev-ah to cut! and look at all the pretty paper I used! With the addition of a mini cupcake wrapper they are the perfect packaging for glitter ornaments, which you can see on my personal blog here. 

And I was nuts enough to make almost 30 of these because they were the goody bags for my daughter's class. I am shuddering right now as I realize that most of them probably went straight in the trash - but that's not why we do it right? And of course now there are several carts with takeout boxes including Sweet Treats and I think Art Philosophy. 

So I can't wait to see what you make with all your pretty paper! I am getting into my room no matter what this weekend! After cookies get done, dance tickets sold, pageant practice over....SIGH. Happy Crafting!
--Allison


Friday, October 7, 2011

October Sketch Challenge

Are you ready to get your sketch on?? I have been busy with these for what seems like forever (!!) but they are finally done and ready for your consumption. And after wresting with the layout for days, only except it felt like weeks, I am finally pleased with the outcome. And now - the sketches!

Layout Sketch

Card Sketch
and now for the projects:


Now before you think I have lost my mind - yes I did do a one page layout sketch but I turned it into a two page layout. Why you ask?? Well the first reason is that last month someone said they liked the sketch but they needed a two page layout  so I wanted to show how it could be done. And the second reason is that I totally planned to do this as one page - even had little wallet size pics printed out  - but then I couldn't bare to just stick to one page!! Look at that little sweetie in her kitty outfit! It was such a nice memory and such great pictures I HAD to do for two pages. 


The printed paper and embellishments are all various K and Company Halloween brands except for the brads  which are Studio G. I used Happy Hauntings for the frame shape behind the large picture - cut at about 8 inches but I also unlocked the width and made it a little skinnier. The yellow circle is from George. 


For this page, I hand trimmed the cat paper to follow the shape of the pattern and then used Celebrate with Flourish for the title which is cut at 3 inches. Now for the cards: 


I decided to do the card sketch in two ways - and you will have to forgive me if I give you incorrect information on the cuts. I promise I do write these things down - I just lose the paper I wrote them down on!! The printed paper is from a Halloween themed scrap stack I found at ACMoore. 


To create the spider web I used a Studio G stamp and some bronze heat embossing powder. If you missed Caroline's tutorial on heat embossing you can see it here. The spiders are epoxy stickers by Recollections. The "boo" is from Mini Monsters and it didn't have a shadow so I cut it twice and layered it. Then I decided it should be more sparkly so I covered it with stickles. For the inside I used more of the paper from the scrap stack and heat embossed with black embossing powder. 


For the second card, I turned the sketch on the side and replaced the boo with an "eek" from Happy Hauntings. I forgot to mention that under the webs is a grosgrain ribbon. 


And I really love how the inside came out - isn't the stamp great??


I think that is everything! Whew! I can't wait to see what you all create - and I hope the sketches inspire you to put your own stamp on them. They don't need to be Halloween - I just loved having the excuse! (although there may have been some tears when I actually had to use my pretty paper *sniff* it is better that I don't think about it) Happy crafting!
---Allison


Friday, September 2, 2011

September Sketch Challenge!

Are you ready to get started?? This is so exciting!! We decided to try and keep each week of the month a certain theme - easier for us to plan and for you to know what to expect. This does not mean however that we won't change it up now and then! I am just not so good at following the rules all the time - it must be Caroline's fault! I have not just one but TWO sketches for you  - so without further ado - here we go!!

Layout Sketch

Card Sketch
and now for the projects:


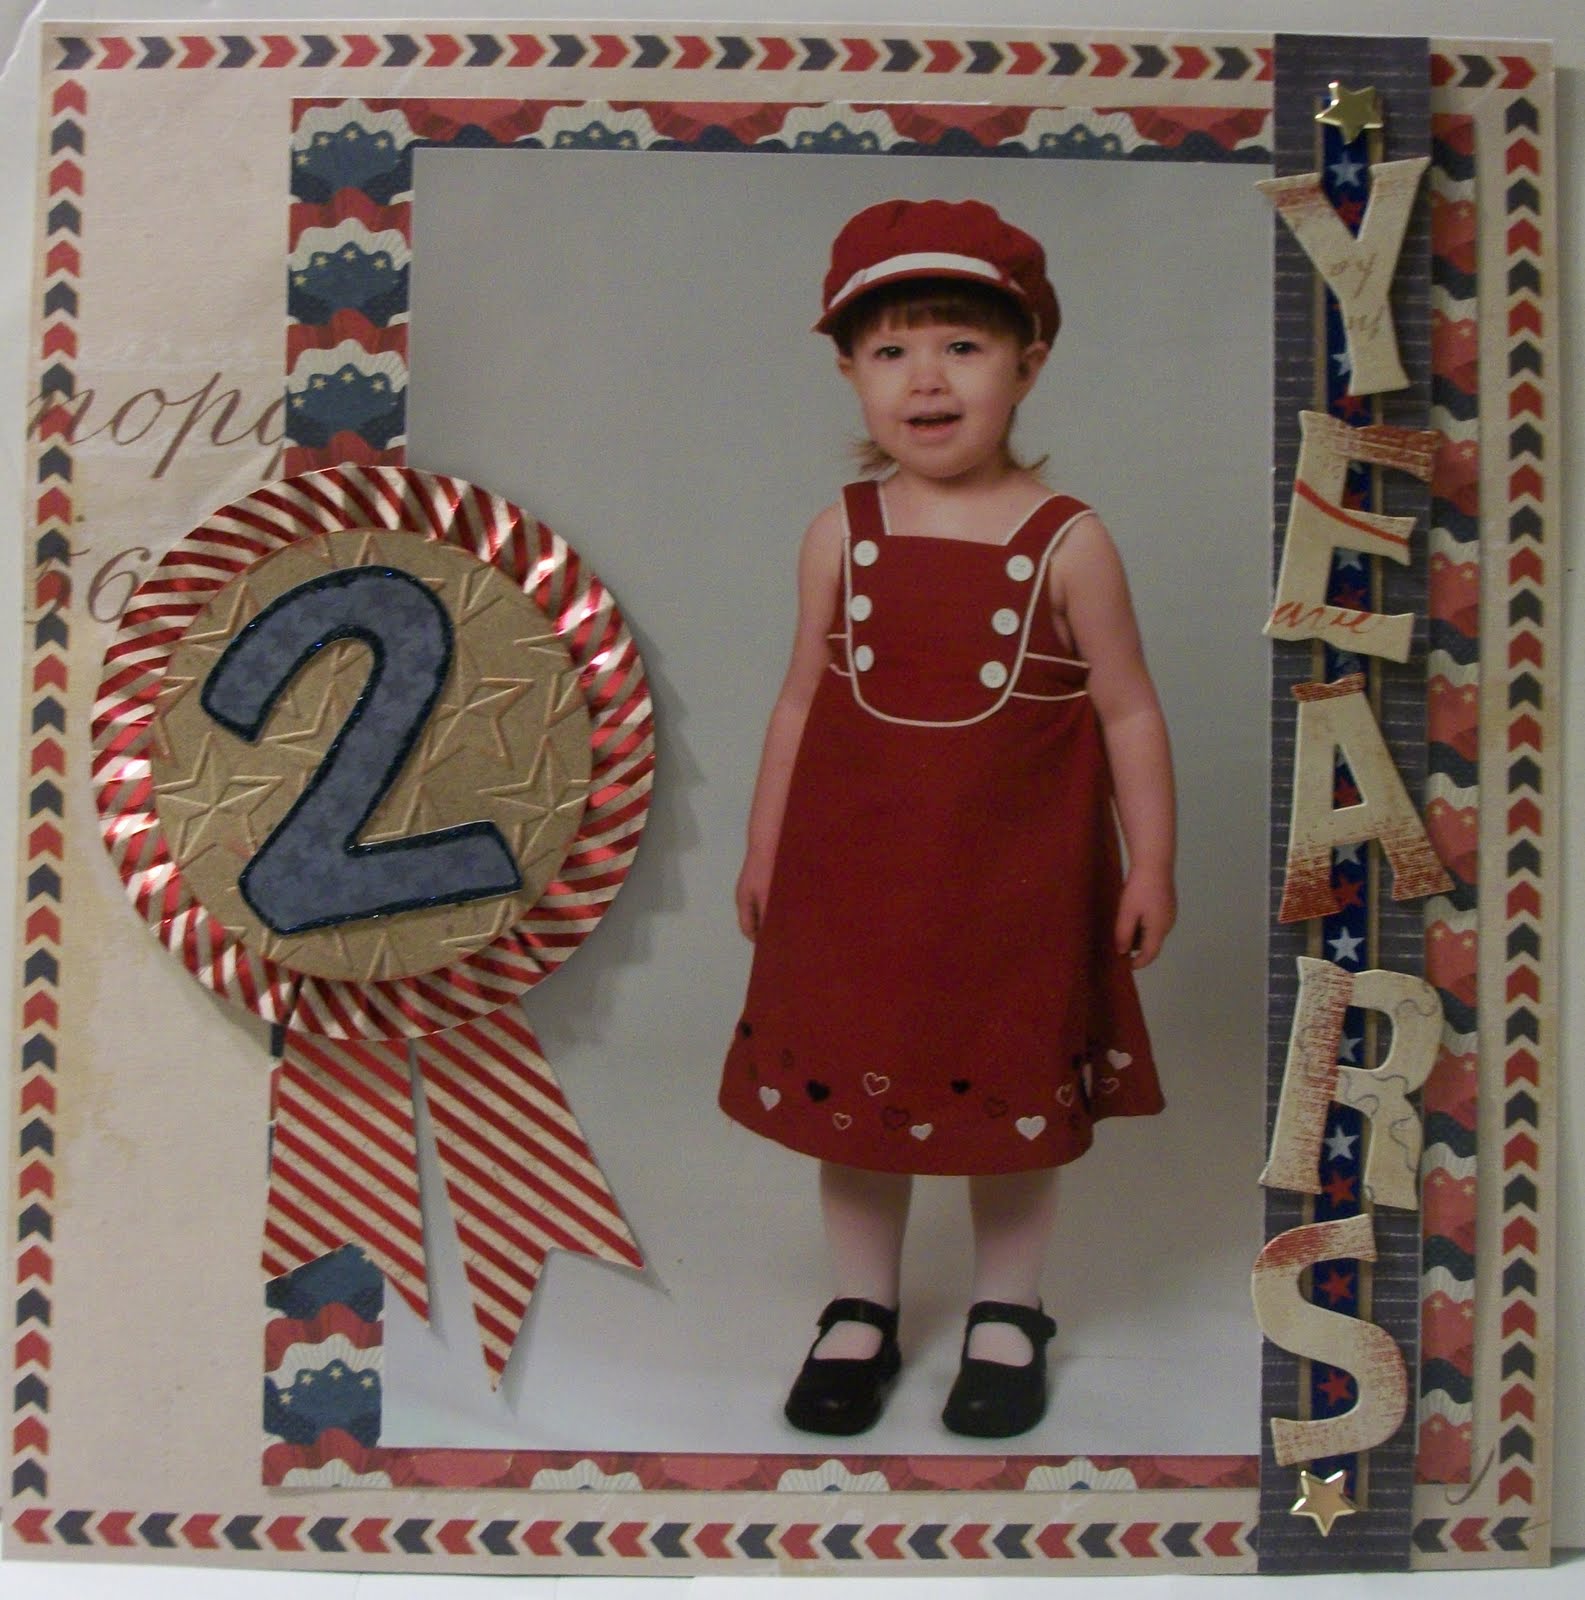
For this layout of my daughter I used paper from the K&Company Americana stack, along with the coordinating chipboard letters. I kept the design simple since I think I am going to use this as a title page tot her two year scrapbook. A closeup of the "award":

This is where I spent the most time on the layout. I began with the award shape which is cut from the Plantin Schoolbook cartridge at 6.70 inches with a 4 inch circle welded to it. On top of that I layered a pleated circle that I created from a 2 by 12 inch length piece of paper, scored at every 1/4 inch. In order to make it lie nice and flat without tearing I did need about a 3 inch strip of another pleated piece of paper. I adhered the ends together, pushed down the middle and secured it at the center with glue dots. Then I added a 3.40 inch circle or kraft paper, also cut from Plantin, that I ran through my Stars cuttlebug folder and lightly inked.I added a "2" from Disney's Pooh Font, cut at 3.10 inches and then outlined with Midnight blue stickles. For the other side, I used some star brads and ribbon on a spare strip of paper to add some layers behind the letters.


For my card I used the same method to create pleated circle - only not as wide. I used a 1-1/2 by 11 inch piece of paper and that was the perfect size to lay nicely without any extra paper. I cut two circles and layered them on top. I finished with an epoxy chipboard cupcake threaded with some bakers twine. The sentiment is a Hero Arts stamp and I used a shape that I stretched on my Gypsy. I wish I could be more specific on the sizes, and I know I wrote them down, but then I lost the paper! The card base is DCWV and the yellow paper is Recollections.

And that is it! Two sketches for you to choose from - one for whichever mood you are in today - card or layout. We are experimenting the a linking tool but it is our first time using it  - you may have to be patient with us. I can't wait to see what you create. Happy crafting!
---Allison