Sunday, October 30, 2011

Frame It Up!

Hello everyone and welcome to the Sunday edition of Paper Craft Weekend Challenge blog!  I have to thank my good friends Caroline and Allison for giving me the opportunity to be your guest designer this Sunday, the day before the ghosts, ghouls and goblins go walking in your neighborhood in search of candy, candy and even more candy!  So, with a Halloween theme in mind, I have a few projects to share with you and of course I am ready to present your challenge:
Frames

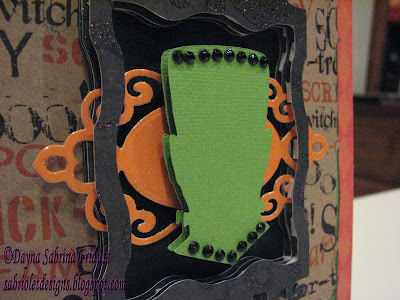
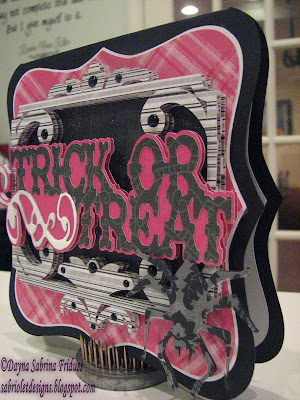
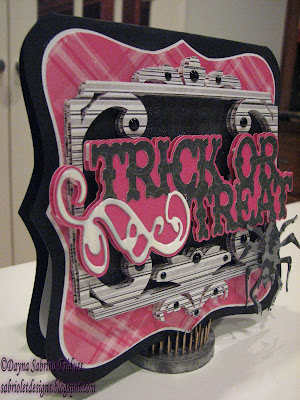
Create a project of any type using a frame and link it up at the bottom of this post.  I created two cards using frames to create a focal point. The first card's frame can be found on the Happy Hauntings cartridge, and just to prove that you can still create something Halloween themed without a Halloween cartridge, I used a frame from the Circle exclusive cartridge Sophie for the second card.


Now those of you who know me know that I am a big fan of dimension.  I mean it's difficult for me to create any project where every piece of paper or embellishment is laying flat on the paper.  I can't begin to tell you how many pop dots and dimensionals I have purchased over the last year.  I would be lost without them.  That being said, one of the best ways to create dimension is to cut out several frames and put some dimension in-between each layer.  I did this on both of these cards, and it certainly makes the focal point stand out that much more.


I am someone who hates the inside of my cards to be bare so I cut out a few additional mats and added some stamps.  Again I used Elegant Edges and Art Philosophy for the decorative mats and all of the stamps are from Papertrey Ink's Halloween tags collection.


My son's birthday party is today.  Thankfully it's not the big production that it was last year, it's just going to be family and a few friends.  I decided to make up a few quick pillow boxes for the few friends he has coming - and his little brother of course who refuses to be left out.  The pillow box image is from Easter 2010.  You can find numerous ones on different Cricut cartridges.  I prefer this one because it's easy to fold down in my opinion.  I used images from October 31st, Happy Hauntings, and Wrap It Up to cut out a Halloween themed image that I covered with a clear page protector from the inside.  And then I framed each of the images using an Elegant Edges frame.  The back of the pillow boxes has a band that I cut using Paper Lace 2.


And that's it.  Okay, maybe not - there's a little blog candy to go along with this post!   I am an avid fan and collector of Spellbinder dies. I have one new set of Spellbinders Snowflake dies up for grabs - just in time for your Christmas or winter themed projects!  For those of you unfamiliar with Spellbinders, you can easily use them in most die cutting machines, including Big Shots and Cuttlebugs.  Here is a picture of the dies:


Just leave a comment at the end of this post and you are entered to win this random drawing!  I will take all comments up until next Saturday at Noon, eastern standard time.  Good luck, and thanks for stopping by Paper Craft Weekend Challenge.  I can't wait to see your framed project!

Recipe:
Paper:  K & Company Kelley Panacci, Kraft Spooky Words, DCWV Blossoms & Butterflies, DCWV Ghost & Gobblins
Cartridges:  Easter 2010, Happy Hauntings, Elegant Edges, Sophie, Art Philosophy, Wrap It Up, Paper Lace 2
Spellbinders:  Ornate Artisian Tags & Accents
Stamps:  Papertrey Ink Halloween Tags
Bling:  Imaginesence, White & Black Enamel Accents, Martha Stewart glitter

Friday, October 28, 2011

Texturize & Embellish!

Hi
This is Pam from Papillon Digital Designs & The BugBytes. Thanks Allison and Caroline for having me on as a guest designer today at Paper Crafting Weekend Challenge.
Today's challenge is to use the things around you maybe the spider webs you got to decorate your home for Halloween (like I have done here) , spiders anything even ribbons or buttons to embellish your project and add texture.
Here is my card


I have used a plain black cardstock, silver wired ribbon (which I got from Costco - isn't it pretty?), some buttons, a feather and the central image is from Dover publications - Greetingcards - which I printed out and cut out with some decorative scissors. I love Dover images.


Then I took a bit of cobwebs we get at store for decor and applied it to the cardstock. It looks better if you xyron or dilute tacky glue with water and apply with a foam brush allow to dry  and then stretch out the spider web. Using ATG gun or tape leaves some marks which can be seen otherwise.

Here's a close up of the spiderweb


 After applying the spiderweb I then added the ribbon (like a cross). Then I took some buttons and further embellished them with rhinestones and stickles and placed 2 buttons on the ribbon with glue dots. Then I took a feather and attached that and placed the center button. The rhinestones and stickles were added to bring some of the color from the image into the card else I felt it would stick out like a sore thumb.
 I inked the image - matted it with black cardstock with corners rounded and then glued it with foam dots onto the card


As for the inside of the card I used the CTMH stamp on white cardstock. Again cut it out with decorative scissors and inked with red ink and added some stickles and then glued it on to the inside of the card with foam dots. I just placed a bit of silver ribbon to give pop


And that my friends is my simple Halloween card embellished with things to add a bit of texture. Now you can even give an illusion of texture for e.g I could have taken the spider web spread it around and then sprayed with paint (mist) or glimmer mist and the web would have acted as  resist and could have got the texture of the web. So do play and add texture or give an illusion of texture and post your project for all of us to see. Thank you for having me as a guest designer once again Allison and Caroline. And readers thank you all for patiently reading this post. I look forward to see your project.
 Happy Halloween!
Pam
-

post signature


Sunday, October 23, 2011

October Something New

Happy Sunday all. This week's challenge is "something new". That's right we all read about all these goodies we have to have or techniques we just have to try. Well this week we are going to use/try those items.

We are still on our Fall theme and what's better than Friday night football in that crisp fall air? I know what would a Floridian know about crisp fall air?? Well while living in North Carolina Friday nights (sometimes Saturday nights) were football nights. Well my friend coaches rec cheerleading for the football team. Well their year end party is next week and she likes to give them a "certificate" to remember their year of cheering. She asked me again this year to make something special for them.

I immediately knew that these would fit into our something new challenge. I actually used 2 something news on them. I used metal roof sheeting for the base covered in paper. I wanted something sturdy but didn't want to do chipboard. And I used action wobbles. Although I tried to use an action wobble before it didn't work right sooo I thought I'd give them another go and LOVE them.


I ended up making 24 of these "certificates" for the girls and can't wait to hear how they liked them.

Now it's your turn. Use a new product that's been hiding in your space. Or try one of those projects/techniques you've always wanted to do.

Can't wait to see what you make!!!!

---Caroline


Friday, October 21, 2011

Theme Challenge - Halloween

Hey everybody! Our fall - themed month continues this weekend with a focus on Halloween! I want to see what you guys are making!! Halloween is my favorite FAVORITE holiday - I just love it and I maybe perhaps even go a little overboard when I see Halloween stuff in the stores. And it is almost that magical time when they will start to clearance and it will all be mine!! I have a really quick and easy project to share with you - canvas bags that will be the goody bags for my daughter's class.


These are 9 by 7 canvas bags that I picked up last year at my local dollar store for 6 for $1 and so I decided that this year I would use my Pumpkin Carvings cart and my heat transfer vinyl to dress them up. (Last year I used glow-in-the-dark vinyl  - you can see that post here on my personal blog.) I asked my daughter to pick out her favorite faces and used the hide contour feature to hide the outline.All of the faces were cut at 5 inches.  I can't say enough how much I LOVE Pumpkin Carvings - definitely my top pick for best Halloween cartridge - it is just so versatile. 

Oh and if you haven't used heat transfer vinyl yet (yes I see all those guilty faces and I am giving you the stink eye) don't forget that it was the focus of this month's Technique Tuesday - click HERE to see it. I would like you to know that I timed myself putting these together tonight. Mind you I cut them all out the other night - but from start to finish (including weeding the vinyl) I finished 20 of these in 25 minutes. Not too shabby! If you are wondering what they will be filled with - let's see - I got them each a Halloween book and then there will be an assortment of goodies - kazoo, parachute guys, glow-in-the-dark bracelets and fingers, pencil, gross frogs, bouncy ball...... I did mention I tend to go overboard for Halloween right?? 

So let's see what you guys are up to for the "best time of year" (according to my daughter - yep that's my girl)!! Happy crafting!
---Allison


Sunday, October 16, 2011

October Use your Stash - Special Challenge

Happy Sunday everyone. Hard to believe it's the start of a new week already. Hope you're ready to get your craft on! This Sunday's challenge is about using your stash. But we decided that in honor of Breast Cancer Awareness Month this challenge is all about "Thinking Pink". However, I did use my stash ... nothing new was purchased for this challenge.


I actually used 2 carts from my stash that I haven't used yet .... Elegant Edges and Designer's Calendar.

So your challenge is to "think pink" and make a project in honor of Breast Cancer Awareness Month and you can't purchase any supplies (unless it's adhesive) ;o)!!

---Caroline


Friday, October 14, 2011

Use Your Stash - Tags, Eyelet, and Embellishments

You all have my sincere apologies for what may be the lamest challenge ever simply because time ran away from me this week. My daughter's birthday is coming up and I have been making 32 (yep 32) Disney - themed invitations this week. That's right - with all those wonderful Disney layers. So before the men in white coats come to get me - here is this week's challenge!

My daughter also came to me last night while I was hip deep in card stock and said the proverbial dreaded words "I want to make something with you"  - and since I had my Halloween box sitting right next to me I grabbed what was handy and we threw together this project:


I grabbed a pack of Recollections Halloween labels and a pack of the same themed Halloween embellishments, gave her the glue dots (she is an expert), pulled out my crop-o-dile and this is the result! We made the labels into tags for the Halloween goody bags for her class - which (fingers crossed) will show up here next weekend. I always seem to save the tags for the last minute and then not do them, but this year we will be prepared. 

A couple of my favorites:


The point is I got my blog "homework" done and we got to spend some quality crafty time together - so all in all not a bad result for a project that took under a half an hour! So for this weekend's challenge you can choose what you want to use - tags, eyelets, embellishments - OR you can try and use all three - as long as you use what you have. I can't wait to see what you come up with - and I will hope you get more time at it than I did. Happy crafting!
---Allison


Thursday, October 13, 2011

Blog Candy Winner

Apologies for the delay - but the winner of the blog candy from this month's Technique Tuesday is - $15 gift card to Michael's or Joann's (her choice according to Random.org is....
and that person is....

Congratulations Sara!! Send us an email at pcweekendchallenge@gmail.com so we can get that right out to you!

Sunday, October 9, 2011

October Product Challenge

Happy Sunday everyone! Today's Challenge is a shimmer challenge. There are all kinds of shimmer products on the market. From Smooch, to perfect pearls, to Glimmer mist, to making your own.


I was determined today not to make a card. I mean I'm not only a card maker right? Well then how come it seems that I only post cards? Well I decided to get in the trenches and alter a box I got from Michael's in the clearance section for like $2.00. The box was a recipe box but I don't want to use it for recipes so I figured I would need to alter it to fit for my intended purpose.

After


Before


It might be hard to see in the picture but I used the smootch spritzers (the clear/pearlescent color) on the base flower. I used the Smooch paints on the leaves and use the water color shimmers on the orange center and then spritzed with the smootch.

I then used a rhinestone swirl on the front of the box. I'm really pleased with how the box turned out. Now let's see what you come up with.

Now before you say you don't have any shimmer products you know here at Paper Craft Weekend Challenge it's all about crafting so if you don't have any shimmer products then use anything that "shimmers".

Happy Crafting!!!

---Caroline


Friday, October 7, 2011

October Sketch Challenge

Are you ready to get your sketch on?? I have been busy with these for what seems like forever (!!) but they are finally done and ready for your consumption. And after wresting with the layout for days, only except it felt like weeks, I am finally pleased with the outcome. And now - the sketches!

Layout Sketch

Card Sketch
and now for the projects:


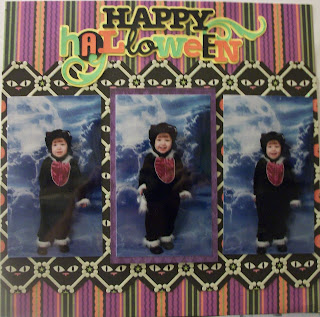
Now before you think I have lost my mind - yes I did do a one page layout sketch but I turned it into a two page layout. Why you ask?? Well the first reason is that last month someone said they liked the sketch but they needed a two page layout  so I wanted to show how it could be done. And the second reason is that I totally planned to do this as one page - even had little wallet size pics printed out  - but then I couldn't bare to just stick to one page!! Look at that little sweetie in her kitty outfit! It was such a nice memory and such great pictures I HAD to do for two pages. 


The printed paper and embellishments are all various K and Company Halloween brands except for the brads  which are Studio G. I used Happy Hauntings for the frame shape behind the large picture - cut at about 8 inches but I also unlocked the width and made it a little skinnier. The yellow circle is from George. 


For this page, I hand trimmed the cat paper to follow the shape of the pattern and then used Celebrate with Flourish for the title which is cut at 3 inches. Now for the cards: 


I decided to do the card sketch in two ways - and you will have to forgive me if I give you incorrect information on the cuts. I promise I do write these things down - I just lose the paper I wrote them down on!! The printed paper is from a Halloween themed scrap stack I found at ACMoore. 


To create the spider web I used a Studio G stamp and some bronze heat embossing powder. If you missed Caroline's tutorial on heat embossing you can see it here. The spiders are epoxy stickers by Recollections. The "boo" is from Mini Monsters and it didn't have a shadow so I cut it twice and layered it. Then I decided it should be more sparkly so I covered it with stickles. For the inside I used more of the paper from the scrap stack and heat embossed with black embossing powder. 


For the second card, I turned the sketch on the side and replaced the boo with an "eek" from Happy Hauntings. I forgot to mention that under the webs is a grosgrain ribbon. 


And I really love how the inside came out - isn't the stamp great??


I think that is everything! Whew! I can't wait to see what you all create - and I hope the sketches inspire you to put your own stamp on them. They don't need to be Halloween - I just loved having the excuse! (although there may have been some tears when I actually had to use my pretty paper *sniff* it is better that I don't think about it) Happy crafting!
---Allison


Tuesday, October 4, 2011

Technique Tuesday - Heat Transfer Vinyl

It's time for a tutorial! This month's tutorial is going to be about how to apply heat transfer vinyl. I personally get mine from Nick at Craft Vinyl - but I have had several people tell me it is also available at their Joann's or ACMoore. And I know some people love their Yudus - but I do not have the patience to wait for all the steps in that process. With heat transfer vinyl I can have my projects done in less than half an hour (on a good day). Let's start with the supplies:

I have my cotton tote bags, vinyl, iron, and parchment paper ready to go. The iron should be dry (pour the water out if it is a steam iron) and very hot!

This is my image from Helly Kitty Greetings (5 inches using the Silhouette feature). You have to flip the image either on your Gypsy or Expression. 

So here is is flipped. For images it really isn't super important but you should know if you don't flip it the image when it is ironed will be facing the opposite way. 

For words you must flip the image  - so here is the phrase I used flipped - "Happy Halloween" from Wild Card cut at 2 inches real dial size. 

Now it is time to cut! Make sure you place the vinyl on your mat shiny side down - you want to cut the dull side. Basic vinyl settings apply: Blade depth 3 - Medium Pressure - Medium Speed


Once the images are cut you need to weed all the excess - which basically means peel off all the stuff around the cut. Your cut image will stay on the plastic and it should. I will say also give you this tip - I was using glitter vinyl here - and that is a bit thicker so I use a longer blade depth and it is much more difficult to weed and see where the cut are (so some swearing might be necessary to facilitate the process). 


You want to place your image shiny plastic up on your tote or shirt. 

Then place parchment paper over your item and the vinyl and then iron over the top. Don't stay in one spot too long - sweep back and forth for a few minutes. Then set it aside to cool. This is the hardest part since as I mentioned - not a fan of waiting - but you have to *sigh*. Once it is all cooled down I peel off the plastic layer, put the parchment back on and then do one more quick swipe to make sure it is really on there. 


  All done! It was so easy that I also added some heat set gems/studs to finish it off. 

I also made another one  - this is for a little boy so I chose the bat image from Pumpkin Carvings cut at 6 inches. I also added the heat set stars to this one. 


Oh and I didn't forget the phrases - I put those on the back of the bags. 

And that is all there is to it! I hope this inspires you to work with a new product and make some great projects! And to sweeten that inspiration - we have some blog candy! This month's blog candy is a $15 gift card to Michael's or Joann's (winner's choice) courtesy of Caroline! Isn't that awesome? All you have to do is leave a comment here to be entered - and it you link a heat transfer vinyl project here you will get a second entry in the drawing! You have until Monday, October10th to be entered. Happy crafting!
---Allison